Sign in with Apple: AppleAuth Java library
20.07.2022
At the annual Worldwide Developer Conference (WWDC), Apple announced its “Sign in with Apple” feature as the equivalent of “Sign in with Facebook” or “Google Sign in”. This is Apple’s way of providing the option for users to sign into apps without having to rely on an external identity provider like Facebook or Twitter. Most iOS and Mac users already have an Apple ID, so this new feature allows them to use it to sign into other apps and websites.
In this article, we will focus on the authentication flow and how to handle Apple’s REST API endpoints using a library we at Accedia have created called AppleAuth Java. Its main goal is to help retrieve the authentication token from Apple with just a few lines of code. The library handles all requests and responses to and from Apple, reduces the development time and the boiler-plate code, and protects you from some head-scratching errors that you might come across. Here’s a link to the source code on GitHub.
Sign in with Apple - UI flow
When you select to sign in with Apple you will be redirected to a page to authenticate your Apple credentials.
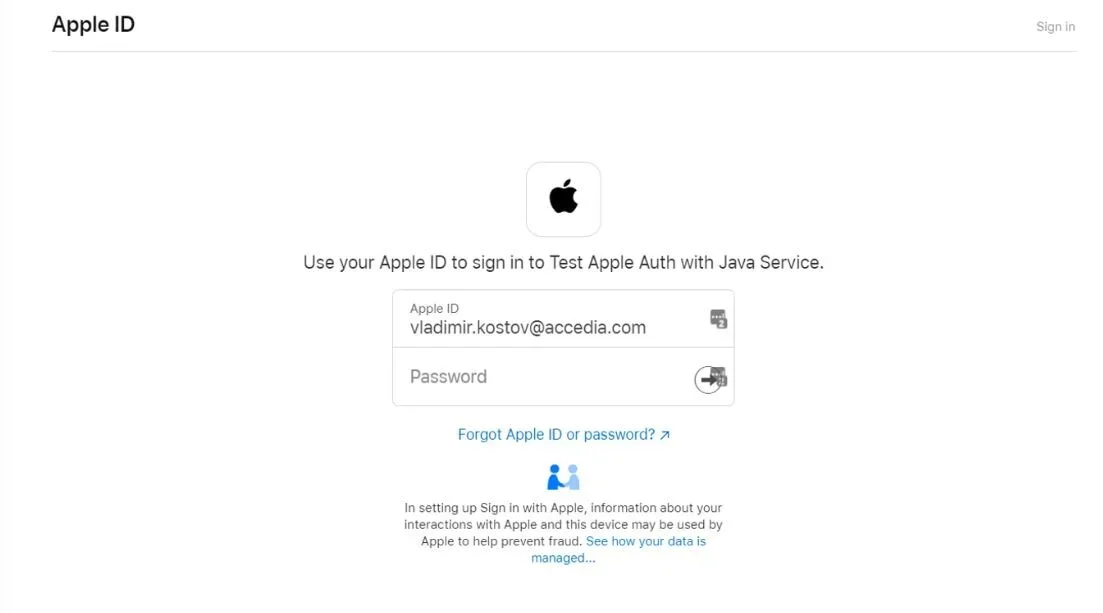
If you are signing in for the first time it will ask you to use your email address.
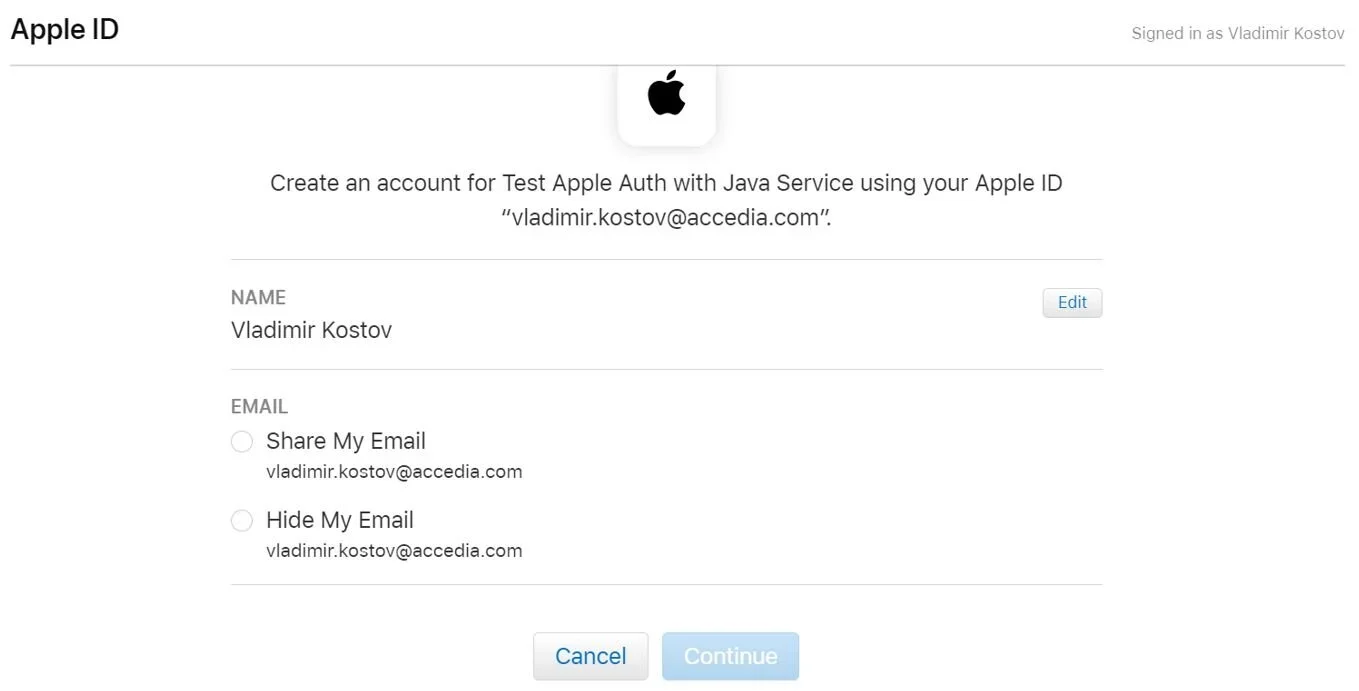
After that, a page will appear to confirm that you want to continue using the application with your Apple ID. Click to continue and log in. Then Apple’s server will send a post request to the redirect URL you have specified (we’ll come to that later).
Configure sign in with Apple in the development portal
Before you can use Sign in with Apple, you must first set up some configurations in the Apple portal that you’ll need for the Sign in to work.
Create App ID
As the name suggests this is the ID of our app. To create this, first, you need to have a registration in Apple and enroll in their developer’s program. More information on it you can find here.
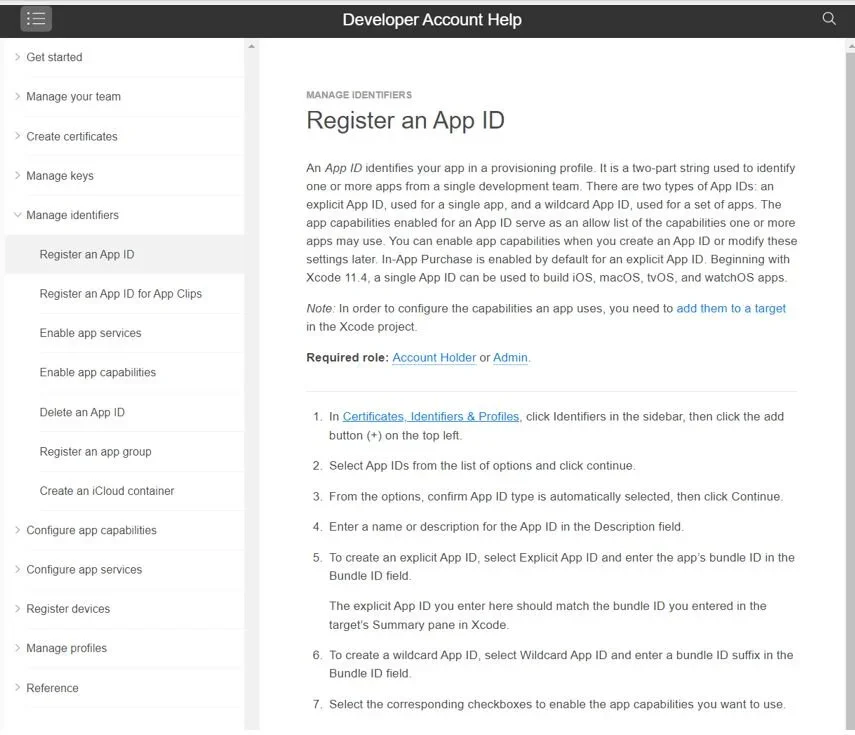
Log in to your developer account and go to the account Help page. Select Manage Identifiers -> Register an App ID -> Certificates, Identifiers & Profiles.
On the next page, select Identifiers from the menu and click on the small “+” icon to create a new one.
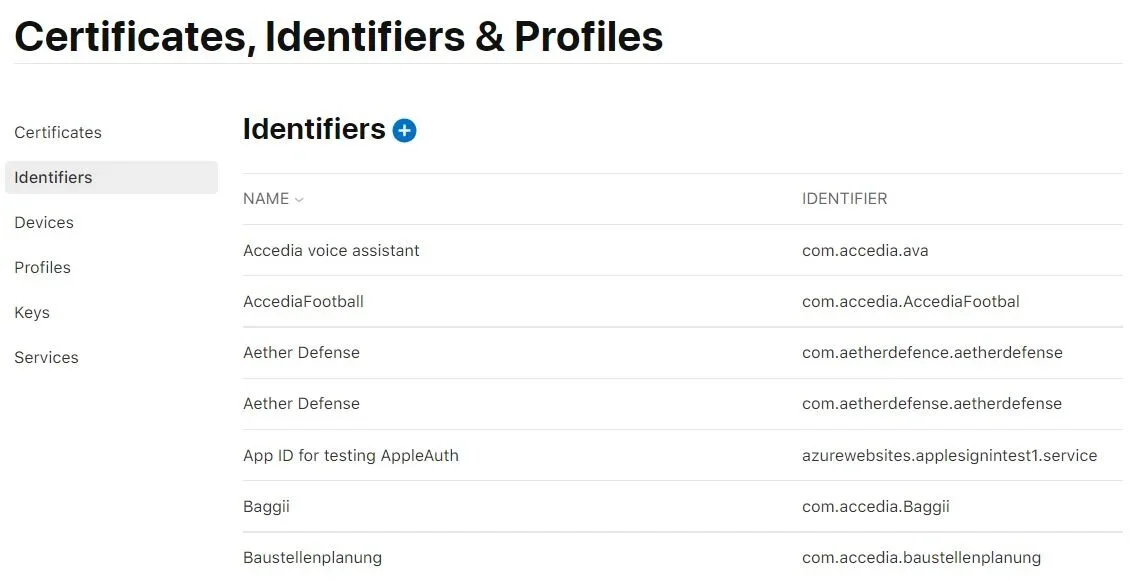
Then choose App IDs and you will be redirected to the following page:
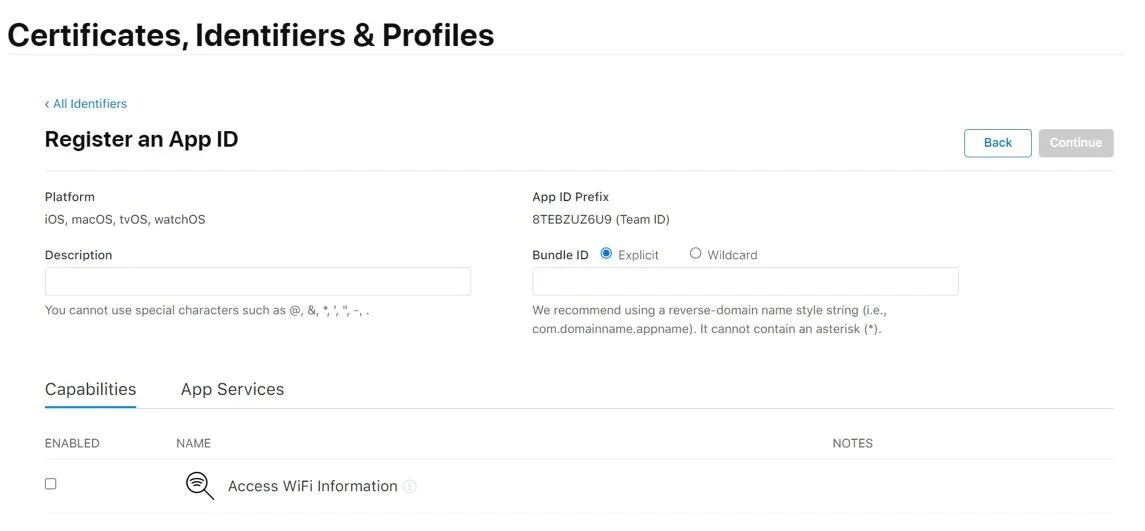
Enter the description of the app and bundle ID, continue, and save.
Create Service ID
Once you have created an App ID you need to create a Service ID as well. Go back to Identifiers and from the top right select Service IDs. Again, click on the “+” icon but this time choose Service ID. Describe your Service and Identifier similar to the app. If it looks confusing you may think of it this way – the App ID is like the corporation, and the Service ID is like the department. Register your Service and Save.
Setup redirect URL
On the Identifiers menu, select Service IDs:
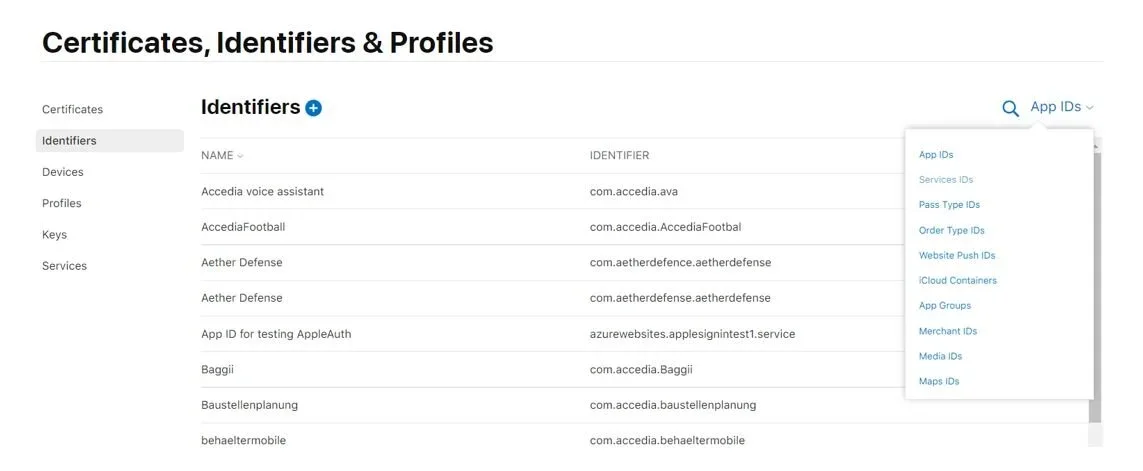
Once you click on your Services you will be redirected to the following page:
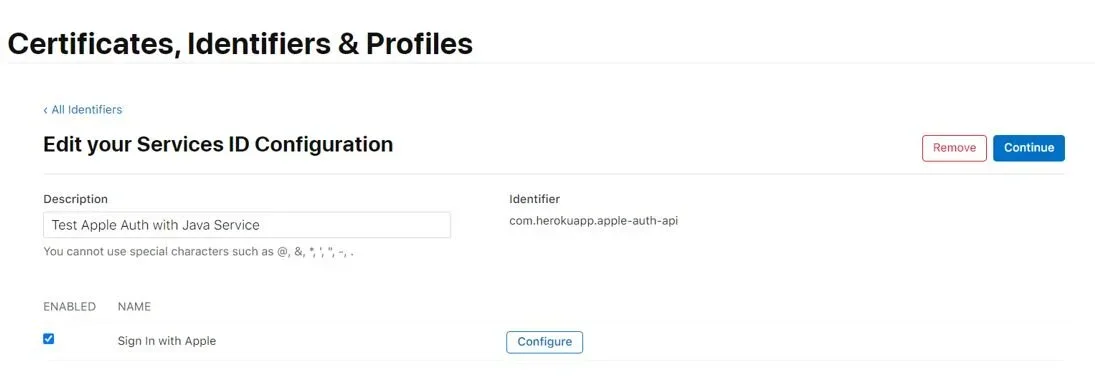
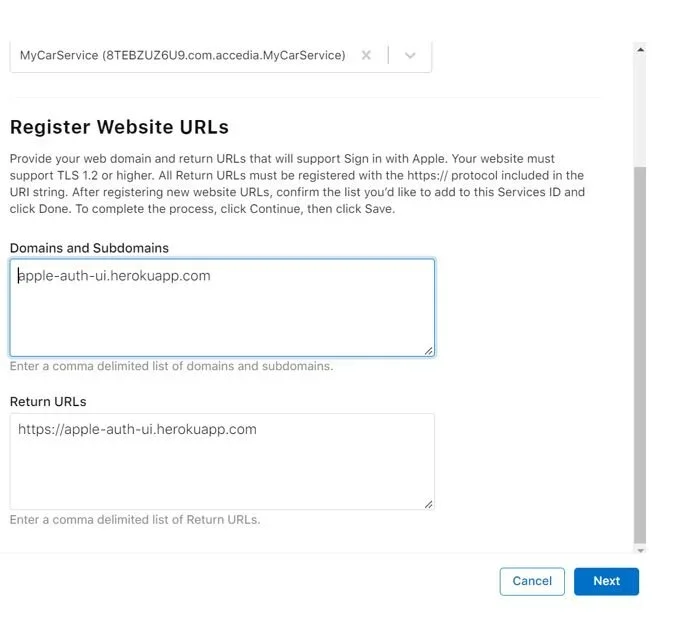
Choose your Service -> Sign-in with Apple -> Configure. Select your primary App ID (the corporation), the allowed domains and redirect URLs. You can use more than one. Note that Apple doesn’t allow you to use a local host or an IP address, so you need to use a real app. For testing purposes, I have created a small REST API using Java and deployed it on Heroku. Click Next -> Continue -> Save.
Create a private key
Click on Keys, and again on the “+” icon. Enter the Key name and select “Sign in with Аpple”. Click to configure the key.
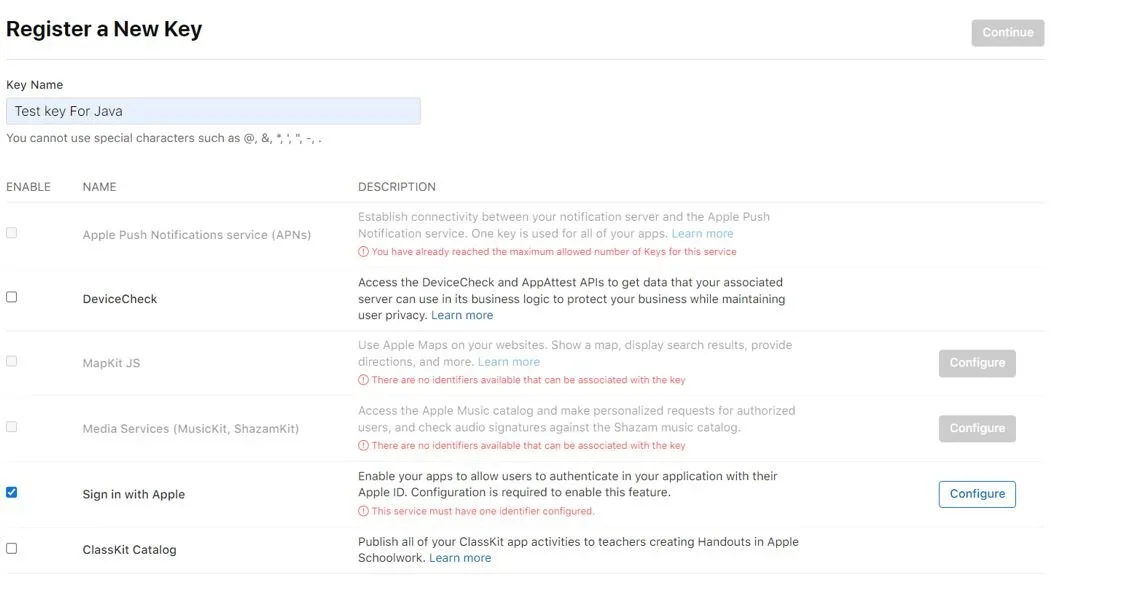
Select your primary App ID (the corporation) and continue to register. Note that you can download the Key only once as the server copy gets deleted, so make sure you don‘t lose it.
As the focus of this article is on the backend implementation, we won’t go into details about how to implement the UI. Still, here is a simple HTML displaying the “Sign in with Apple” button.

If you want to display the Sign in with Apple’s page as a popup, apply some style changes to the buttons, or handle the response from Apple directly on your page using JavaScript. You can also follow Apple’s guidelines.
Done. Now we can focus on the programming part.
Implement Apple-Auth-Java
The whole flow
Before we start, let me first walk you through the whole flow. When we select to authenticate with Apple, an initial request is made from the frontend to Apple carrying information about the Service ID, redirect URL, etc. The redirect URL is very important as this is the endpoint that our API will listen to for the x-www-form-urlencoded POST request which we will receive from Apple. The request contains the state, code, and ID of the token.

After we receive this information, we are going to use the code and the private key (that we generated from the Apple console and stored) to create a second request to Apple. In that second request we are going to send the private key that we sign using the Elliptic curve signature algorithm and the code. Apple will verify that both our private key and code are correct and then we will receive as a response the actual authentication token.
Here’s what the backend service looks like:
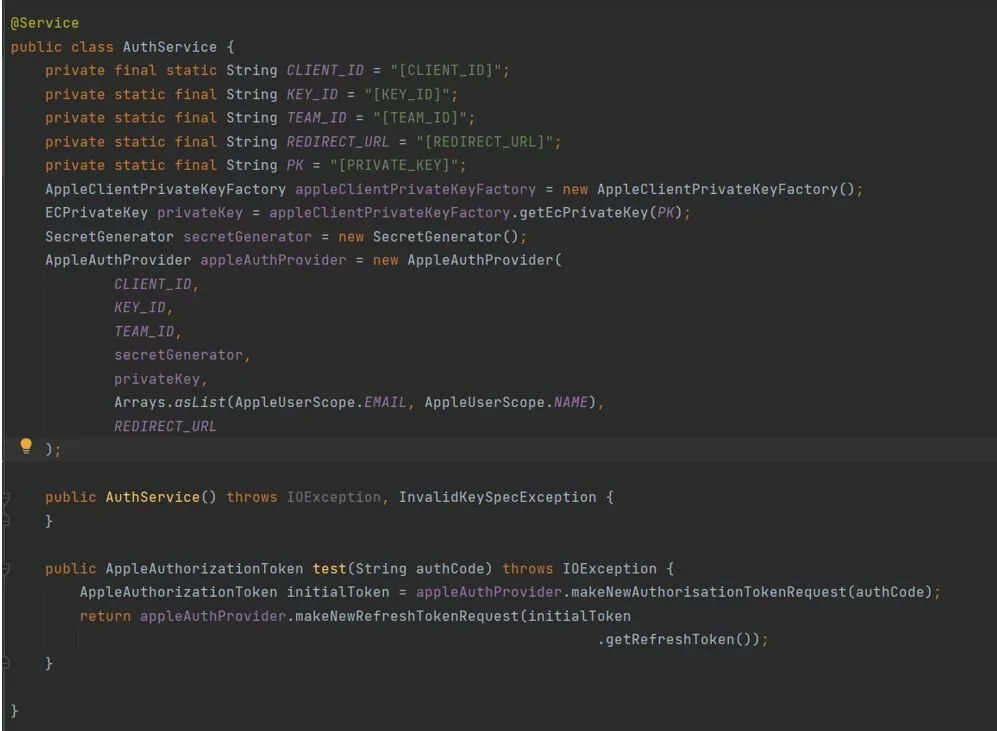
The Apple Auth library simplifies things and basically handles everything for us. We will dive deeper behind the scenes to see what happens.
Import the library
There are a few ways you can import the library. You can do it as binary, build and import the jar file, or manually import the packages. I’ve chosen the second approach - cloned the repo of the library, built a jar file, and imported it.
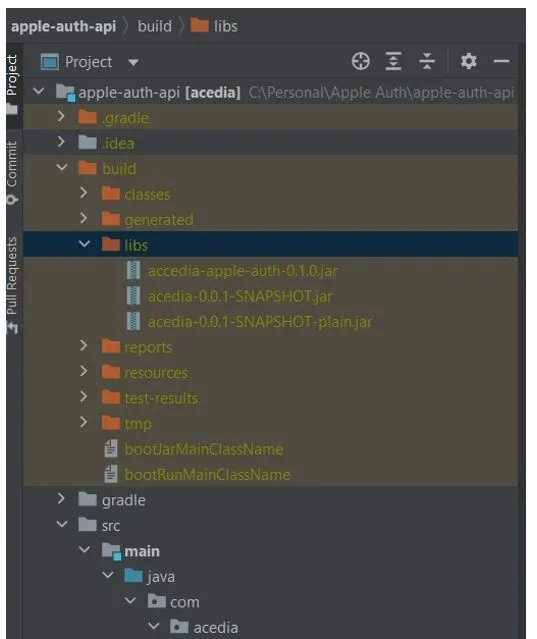
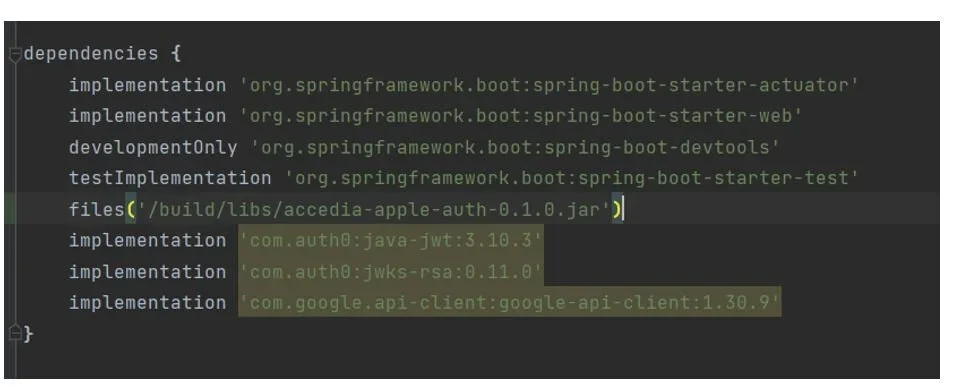
I’m using a Gradle project. For this approach to work you also need to modify the build.gradle file by manually adding the path to the jar.

Note that depending on the Gradle version it might not index the dependencies the library uses so you might need to import them manually as well.
For the purposes of the demo, I’ve set up a small REST API with an endpoint that accepts POST method and listens to the request from Apple. Then we have the Auth Controller and Auth Service which handle everything for us.
Generate Auth provider
The Auth provider sends a request that contains the header and payload. It’s signed using the Elliptic Curve Digital Signature Algorithm (ECDSA) with the P-256 curve and the SHA-256 hash algorithm. For the signature, we use the Private Key generated from the portal and the custom Apple client Private Key Factory to sign the Private Key. The factory uses java.security.KeyFactory and java.security.spec PKCS8EncodeKetSpec libraries to import and sign the Private Key.
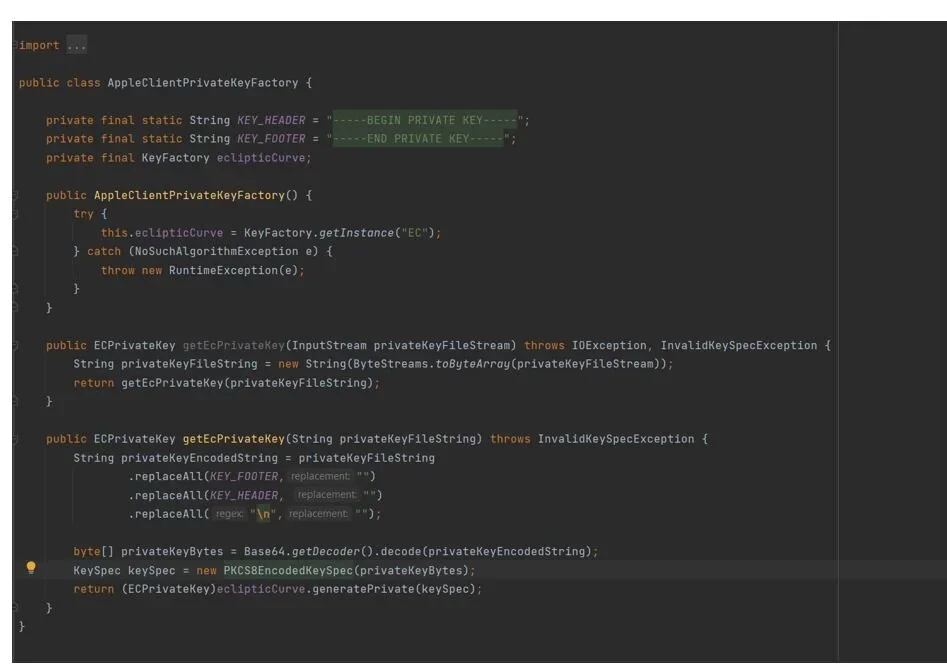
Let me walk you through what happens here:
First, we create an instance of the KeyFactory which provides an implementation of the Elliptic Curve Digital Signature Algorithm. Then we return an instance of java.securityECPrivateKey class that we’ll use in our Auth provider.
The next step is to create an instance of our secret generator. This is another custom class we’ll use to generate and add the JWT token we need to send to Apple. Note that we use our Private Key instance to sign the JWT token.
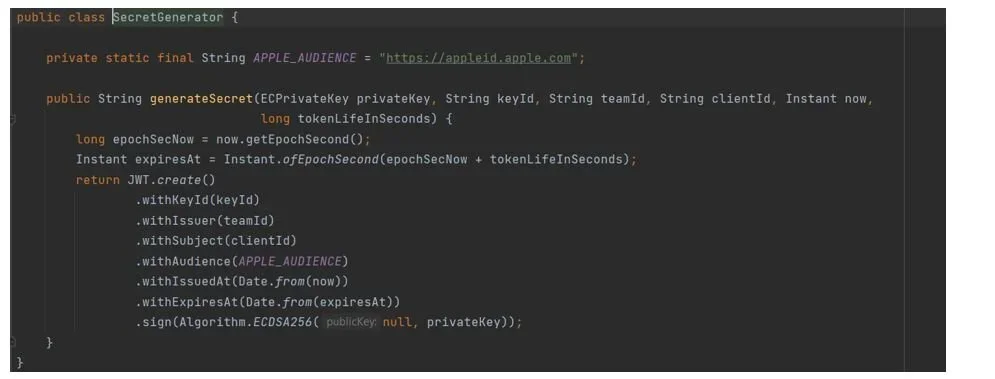
What we do here is get the current and expiration time of the token. Then using the oauth.jwt library we create a string with all the parameters.
Now that we have our Private Key signed and our secret generator, it’s time to create an instance of our AppleAuthProvider. For that, we will also need our Client_id, Key_id, Team_id, and the redirect URL, all of which we must get from our Apple console.
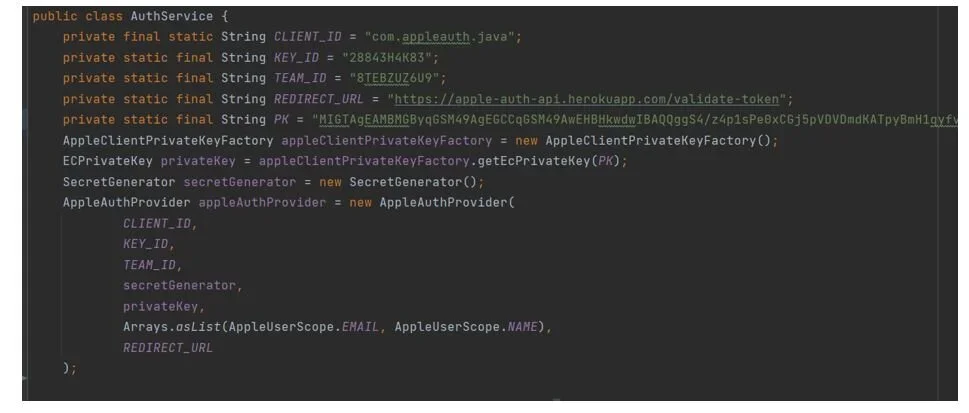
Send a request to Apple
Now it’s time to send a request to Apple to retrieve the Authorization token. This is the main purpose of our AppleAuthProvider class. For this purpose, we are going to call the makeNewAuthorizationTokenRequest method.
Apple will expect an application/x-www-form-urlencoded request containing:
- client_id - Client ID from the Apple portal.
- client_secret - JWT that we generate using our SecretGenerator class.
- grant_type - set to either “authorization_code” (which denotes an Authorization token) or “refresh_token”, which we can use to verify that the user is still using Apple ID to sign in to our platform. The library provides us with another custom method for that – make a refresh token request.
- redirect_uri - we have already specified it in the Apple portal.
- code - authorization code that we received from the initial request.
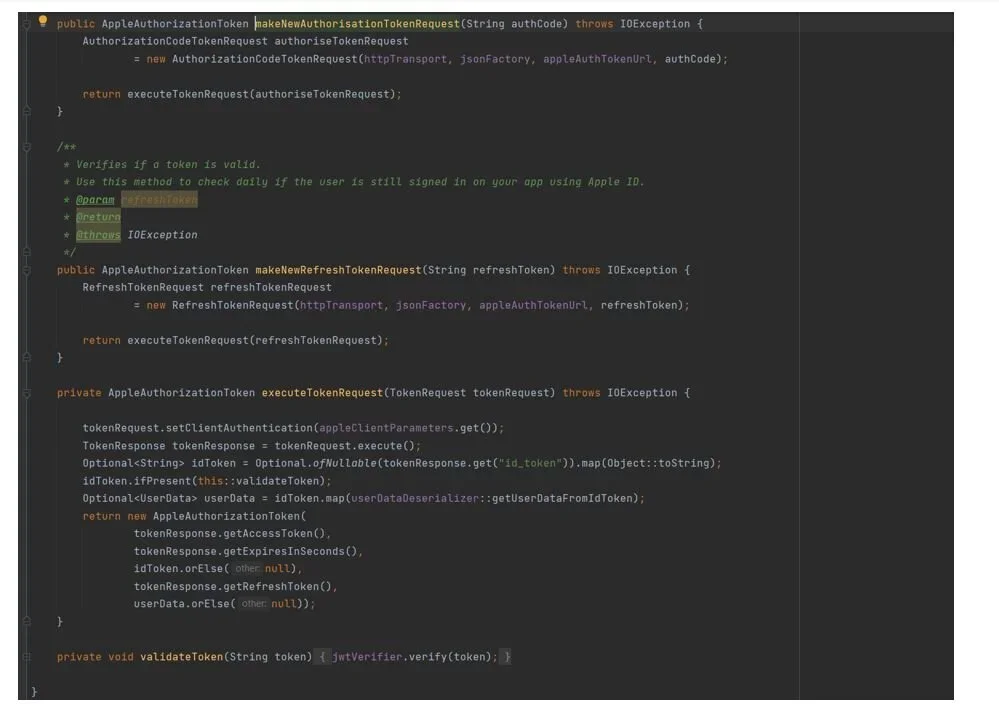
So, what happens here? We create an instance of Authorization code token request which purpose is to send the actual request to Apple. Then we execute the request and handle the response in the executeTokenRequest method. If you have done everything correctly you will receive a JSON response from Apple that contains the following fields:

After we receive the response, first we validate the token using com.ouath.Jwt.Jwt verifier. Next, we extract the user data using another custom class - UserDataDeserializer. It returns UserData which contains the email of the user. This email is then added to AppleAuthorizationToken. If you have reached this point, you know that the user is authenticated. From then on depending on how the application is structured we can create our custom JWT, or we can use the one that’s returned from Apple.
“But how do we then acquire the custom JWT or the one from Apple in the front-end?” I hear you say.
As proposed in the guidelines from Apple you can add an event listener to listen for successful authentication or you can implement the SignIn function.
The Role of Java in Finance Software Development
Conclusion
As you can see, it can be a long way to implement the Apple authentication yourself. For the most part, it requires a lot of boiler-plate code. As with most libraries, Apple Auth’s main purpose is to handle writing boiler-plate code and save you from making time-consuming mistakes. Of course, if you like Cryptography JSON WEB TOKEN and ECDSA you certainly can do it yourself but as we now have an out-of-the-box solution, I would certainly recommend using the AppleAuth-Java.
Interested in learning more about Sign in with Apple and its implementation with .NET? Check out our step-by-step guide.